Introduction
RaydiantKit is Raydiant's screen signage SDK. Raydiant apps are offline-first React applications that can be configured and published through the Raydiant Dashboard.
Inspired by create-react-app, RaydiantKit makes it easy to develop screen signage applications with zero build configuration.
This document assumes you have some experience with React and async / await.
View on Github · Video App · Weather App · Menu App
Installation and Setup
RaydiantKit requires Node 8 or higher. Run node --version to make sure you are running a compatible version.
To create and run your first Raydiant app, run the following commands:
npx create-raydiant-app my-app
cd my-app
npm start
The npx command comes installed with Node 5.2+ and will download the create-raydiant-app cli and bootstrap your first Raydiant app. Run npm start to start the app in the RaydiantKit development environment.
You don't need to install Webpack, Babel or ESLint — RaydiantKit conveniently handles all the build configuration for you.
Running create-raydiant-app my-app will scaffold a new app inside a directory called my-app with these files:
my-app
├── src
|   └── index.js
|   └── styles.css
├── raydiant.config.js
├── package.json
├── icon.svg
└── thumbnail.svg
Commands
Useful npm (or yarn) commands you can run from the app directory:
npm start
Runs your app in the simulator for local development.
npm run build
Bundles a production build of your app to /build. Run this before deploying.
npm run deploy
Deploys a new version of your app from /build.
npm run static
Output the app and simulator as a static site to /static. Useful for sharing a test page before deploying.
npm run test
Runs the jest test suite against files ending in .test.js.
withRaydiantApp
The entry file for Raydiant apps is src/index.js and it must export your app wrapped in the withRaydiantApp higher-order component:
// src/index.js
import { withRaydiantApp } from 'raydiant-kit';

const App = ({
  presentation,
  isPlaying,
  playCount,
  onReady,
  onComplete,
  onError,
}) => {
  // ...
};

export default withRaydiantApp(App);
Wrapping your app in withRaydiantApp will inject these props into your app.
| Prop | Type | Definition |
|---|---|---|
| presentation | object |
An instance of your application with the user-defined name and values. ie. { name: 'Weather', values: { city: 'San Francisco' } } |
| isPlaying | boolean |
Starts at false and becomes true when your app is visible. |
| playCount | number |
Starts at 0 and increments on every play when your app is looping. |
| onReady | function |
Call this when your app is ready to be displayed, typically after fetching initial data. |
| onComplete | function |
Call this when your app has finished displaying, typically after an event like videoend or a user-defined duration. |
| onError | function |
Call this with an Error object when your app errors. |
Configuration
All Raydiant apps have a raydiant.config.js file to specify how it appears in the Dashboard.
// raydiant.config.js
export default {
  name: 'Weather',
  description: 'Display local weather conditions.',
  callToAction: 'Add Weather',
};
Config Options
| Option | type | Description |
|---|---|---|
| name | string |
The display name of your app. |
| description | string |
The description of your app. |
| callToAction | string |
The text to display in the app selector. |
| properties | object |
Defines the inputs of your application that appear in the presentation builder. |
| simulator | object |
Simulator-only options. (See the Simulator section for available options.) |
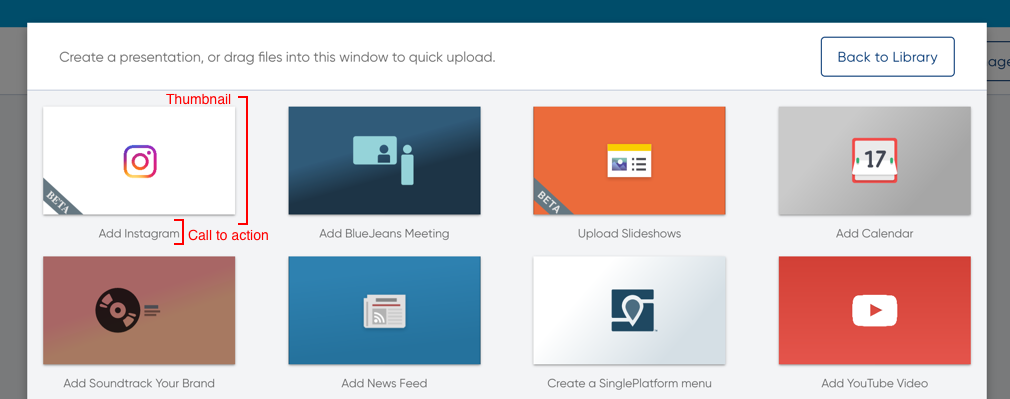
Adding an Icon and Thumbnail
To upload an icon and thumbnail, add an icon.svg and thumbnail.svg to the root directory of your app.

Properties
Presentation properties define how the user can configure your app from the Dashboard. Use RaydiantKit prop types and their modifiers to create the presentation builder experience.
// raydiant.config.js
import PropTypes from 'raydiant-kit/prop-types';

export default {
  name: 'Weather',
  description: 'Display local weather conditions.',
  callToAction: 'Add Weather',
  properties: {
    city: PropTypes.string('City')
      .required()
      .helperText('eg. San Francisco, US')
    duration: PropTypes.number('Duration')
      .min(15)
      .default(15)
      .helperText('Time in seconds.')
  },
};
All prop types inherit common modifiers for required inputs, default values and helper text / links. The first argument of every prop type is the label of the input.
string('YouTube Video ID')
  .helperText('Where do I get my video id?')
  .helperLink('https://lmgtfy.com/?q=youtube+video+id')
  .default('bWeWIOoMllM')
  .required();
string('Heading Text').maxLength(200);
text('Body Text').maxLength(400);
number('Duration')
  .min(10)
  .max(300);
boolean('Mute');
selection('Theme')
  .option('light', 'Light')
  .option('dark', 'Dark');
image('Image');
video('Video').maxSize(2000000); // In bytes.
file('PDF').contentTypes(['application/pdf']);
// The first argument is the plural label and the second is the singular label.
array('Categories', 'Category')
  .items({
    name: string('Category'),
    items: array('Items', 'Item').items({
      name: string('Item'),
      price: number('Price'),
    }),
  })
  .maxItems(10);
Check out Menu for an example of using array types.
Simulator
Running npm start from your app directory will start the Raydiant app simulator. You can test various presentation values in the simulator using the presentations option:
// raydiant.config.js
export default {
  // ...
  simulator: {
    presentations: [
      {
        name: 'San Francisco',
        values: { city: 'San Francisco, US', units: 'imperial' },
      },
      {
        name: 'Toronto',
        values: { city: 'Toronto, CA', units: 'metric' },
      },
      {
        name: 'Sydney',
        values: { city: 'Sydney, AU', units: 'metric' },
      },
      {
        name: 'Not Found',
        values: { city: 'Not found' },
      },
      { name: 'New Presentation' },
    ],
  },
};
The active presentation is injected into your app's props:
// src/index.js
import { withRaydiantApp } from 'raydiant-kit';

const Weather = ({ presentation, isPlaying, onReady, onComplete, onError }) => {
  // presentation = {
  //   name: 'San Francisco',
  //   values: {
  //     city: 'San Francisco, CA',
  //     units: 'imperial',
  //     duration: 10,
  //   }
  // }
  // ...
};

export default withRaydiantApp(Weather);
File Uploads
Raydiant apps can use files uploaded through the Dashboard. To accept files, your app must define a file presentation property.
// raydiant.config.js
import { image, video, file } from 'raydiant-kit/prop-types';
export default {
  // ...
  properties: {
    image: image('Image'),
    video: video('Video'),
    pdf: file('PDF').contentTypes(['application/pdf']),
  },
};
The url of the upload will be available on the file prop.
// src/index.js
import React from 'react';
import { withRaydiantApp } from 'raydiant-kit';

// Render the image and call onReady when it has loaded.
const PictureApp = ({ presentation, onReady }) => (
  <img src={presentation.values.image.url} onLoad={onReady} />
);

export default withRaydiantApp(PictureApp);
Local Files
You can test local files by adding them to a files directory in the root directory of your app. The relative url can be referenced from your simulator presentations.
// raydiant.config.js
export default {
  // ...
  simulator: {
    presentations: [{ name: 'Video', values: { url: 'video.mp4' } }],
  },
};
Check out Video Player for an example of handling file uploads.
Environment Variables
Environment variables are injected at build time and must be prefixed with RAYDIANT_APP_ to access them in your app.
You can add environment variables in a .env file in the root directory the app.
# .env
RAYDIANT_APP_WEATHER_API_KEY=key
// src/index.js
const apiKey = process.env.RAYDIANT_APP_WEATHER_API_KEY;
You can also add environment specific environment variables.
.env.developmentwill be loaded when running the simulator for local development..env.productionwill be loaded when building for deployment..env.testwill be loaded when running the test suite.
.env files should be checked into source control because they should not contain any values that can't be injected into client code.
Browser Support
The Raydiant device runtime is Chromium based so at minimum your app needs to support the latest version of Chrome. It is also recommended that you also develop your app against the Chrome browser.
The Raydiant Dashboard will also load a preview of your app while creating or editing a presentation and supports Chrome, Safari, Edge and IE11. Your app should work with these browsers or provide graceful fallbacks if they don't.
Deploying to the Dashboard
RaydiantKit is currently in closed beta, contact support@raydiant.com and request an API token and app id to deploy your app.
Examples
The examples are published so you can play around with them online. To run them locally you will need to install yarn and clone the repository.
git clone git@github.com:raydiant/raydiant-kit.git
yarn
cd examples/weather
yarn start
Video Player
Displays a user-uploaded video. Demos file uploads.
Weather
Fetches local weather data for a specified city. Demos data fetching, in-animations and environment variables.
Menu
Display a table of menu items. Demos array types.